It's not a spare room at all - after a long and difficult pregnancy and long and more difficult baby, if I got more than 4 hours sleep I called it a 'good night'. I neglected virtually all DIY jobs and demanded OH help me with the kids any spare minute he had.
The spare room should be Teeny's bedroom, but his cot is still in our room *hangs head in shame
The room was renovated by our builders (the good ones) They repaired the structure and treated all the old timbers against rot and woodworm before insulating and plasterboarding about half of the room it was not finished due to time and money restrictions. There was a substantial amount of work still left to do - and in the intervening 4 years... yes 5 YEARS!! we have used it as a storage room *hangs head in double shame
Click through to read Part 1
Where we opened the door and realised the room was full of crap that we had dumped in there
Click here to read Part 2
Where we realised exactly what all the crap was and worked through it.
Here begineth Part 3
John was on insulation duty, getting every nook and cranny of the roof space insulated as much as possible. Rigid board insulation has been put between the beams of the coombed (sloped) ceiling, insulating right across the face of the beams would have been 'better', but then we would have eaten into the already small room too much.
The short walls have rigid insulation with rock wool behind (as this forms part of downstairs' ceiling) The small horizontal ceiling is insulated with as much rock wool as would fit. It is important to leave plenty of air circulation especially in an old building where ventilation plays a large part in keeping damp at bay.
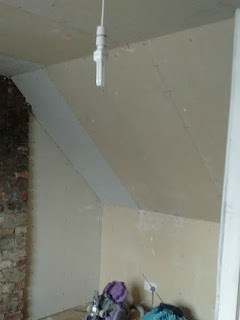
Once the insulation was completed the plasterboard sheets were screwed in place.
Once the plasterboard was finished I took over with a giant tub of jointing compound and some ill-fitting overalls.
I've been perfecting my taping technique over the years and as I progress through each room I become more adept - though I make a terrible mess of the floor in the process (Don't worry - It cleans off fairly easily, and we are leaving the floor to last)
Look at that.... smooth a baby's bum ...
As I write this the taping is almost complete. A couple more evenings from me and the plasterboard walls will be ready for sanding and painting.
Our baby boy's room is finally starting to look like a room!


No comments :
Post a Comment
I love getting your comments, they really make my day! I try to respond when I can.
I moderate all comments to cut out the stinky spam. So please be patient if it hasn't popped up immediately.
If you ask a question remember to check back for an answer later.
Thank-you, you wonderful peeps!